平时使用php调试程序,都是使用var_dump()、print_r()、echo等函数,这样调试起来效率很低,php提供了xdebug扩展,来帮我我们调试。
利用ide 和 xdebug,可以实现像平时调试Java一样的效果。
安装xdebug扩展
Mac环境下可以使用homebrew直接下载安装,Windows环境去Xdebug下载安装。
注意:不论是用homebrew安装,还是自己下载安装,安装完毕后,默认和调试相关的 xdebug_remote_enable设置是不开启的。可以通过phpinfo查看xdebug扩展是否开启。
设置xdebug扩展
找到php.ini文件,(用homebrew安装的修改/usr/local/etc/php/7.1/conf.d 目录中的ext-xdebug.ini文件就好)主要设置以下参数:
1 | xdebug.remote_enable = on //设置xdebug扩展远程开启 |
设置phpstorm
设置phpstorm上的xdebug端口
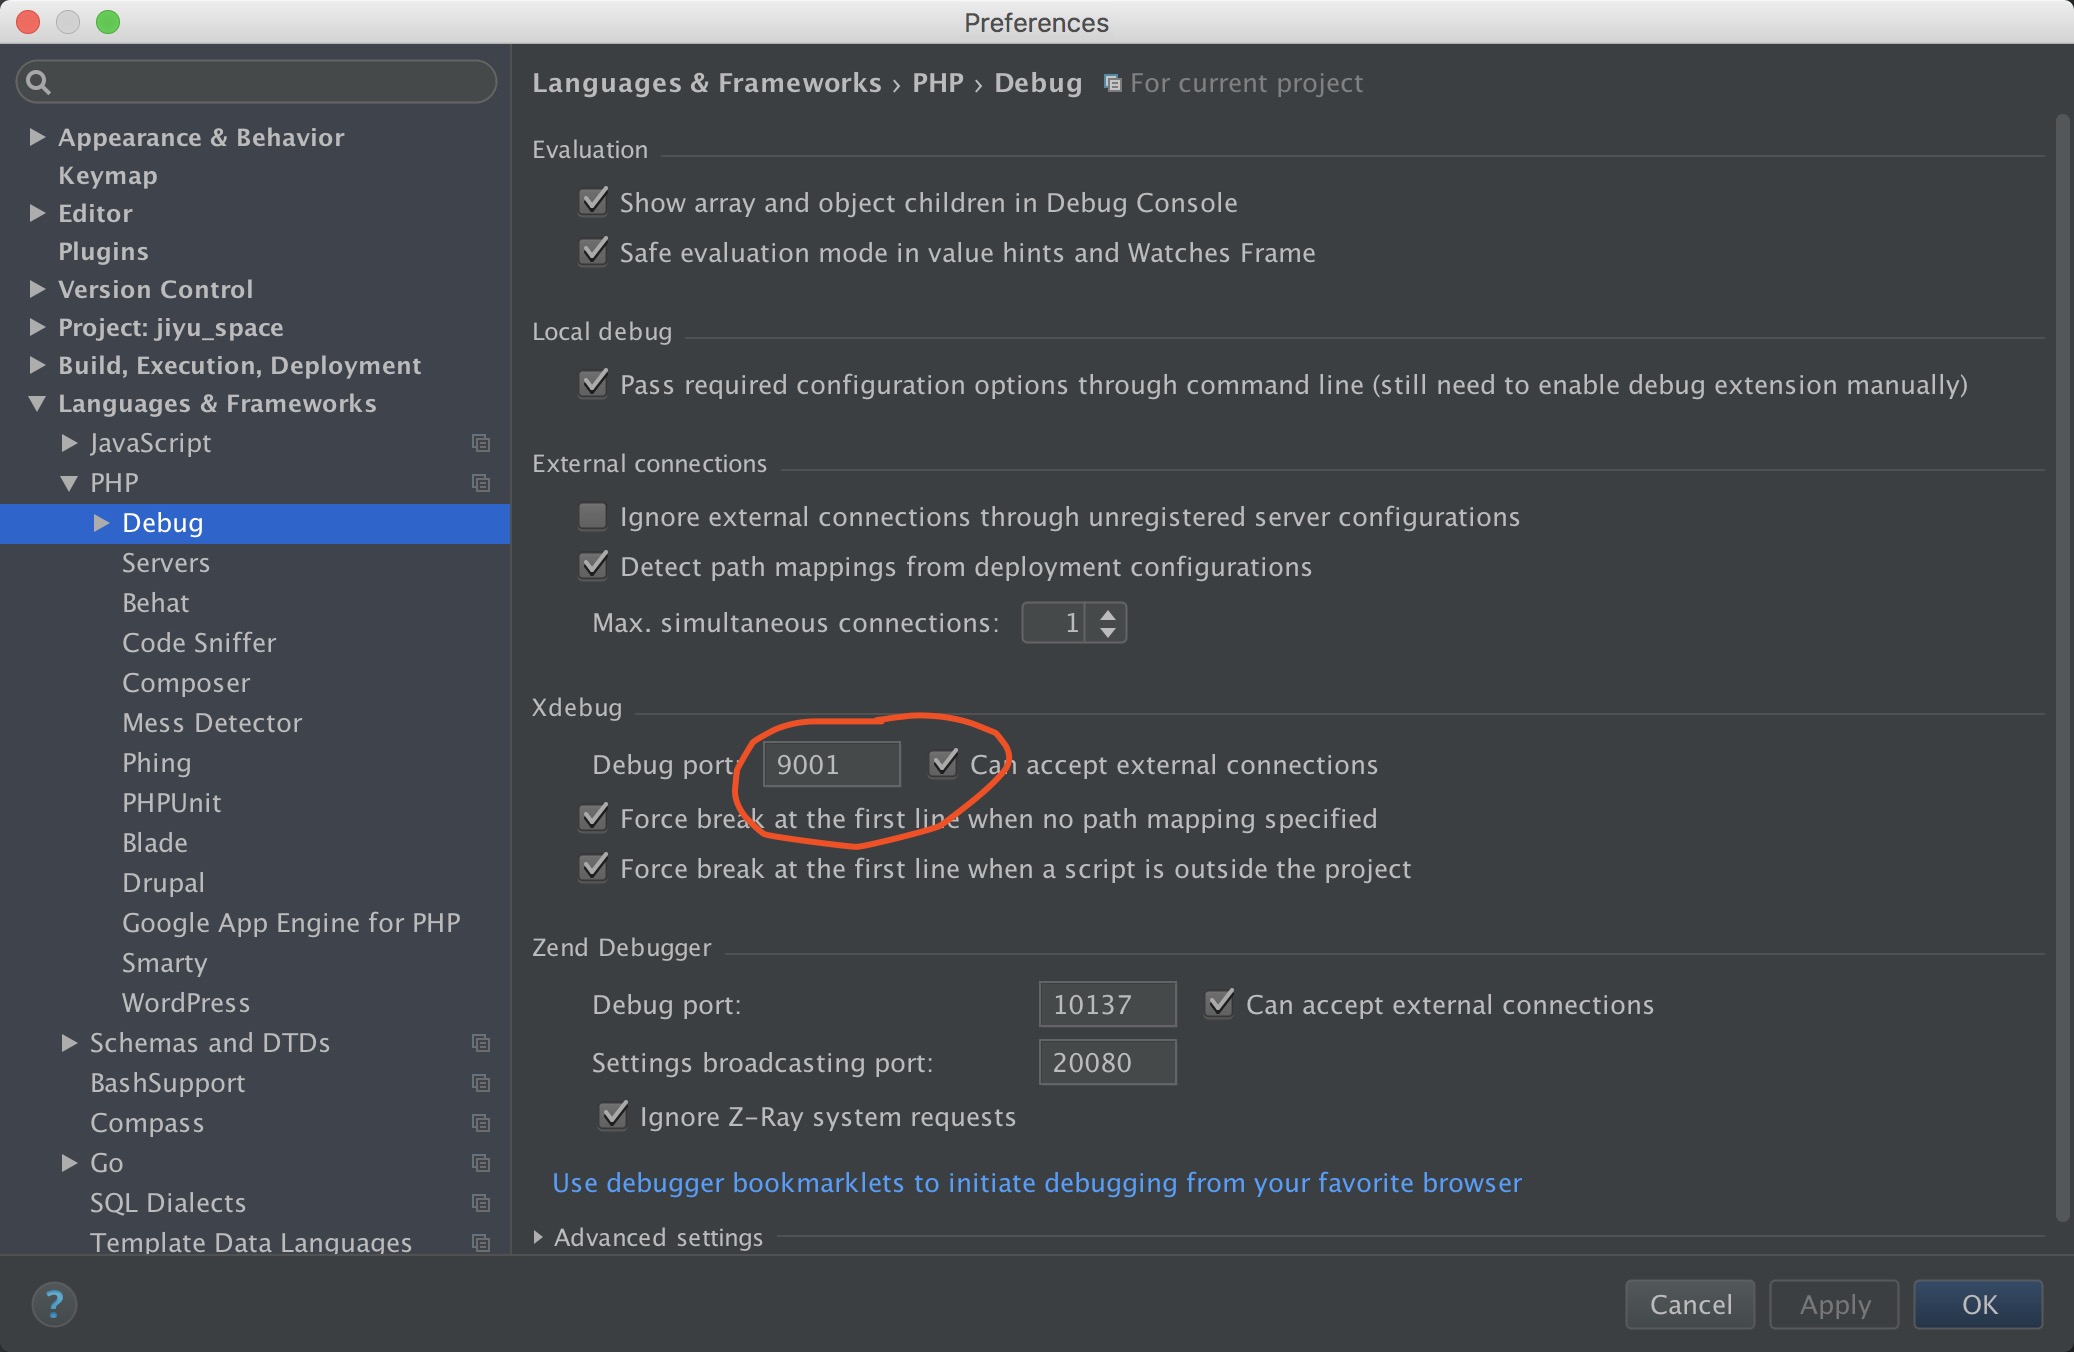
9001为xdebug扩展中xdebug.remote_port的值
设置phpstorm上的xdebug idekey
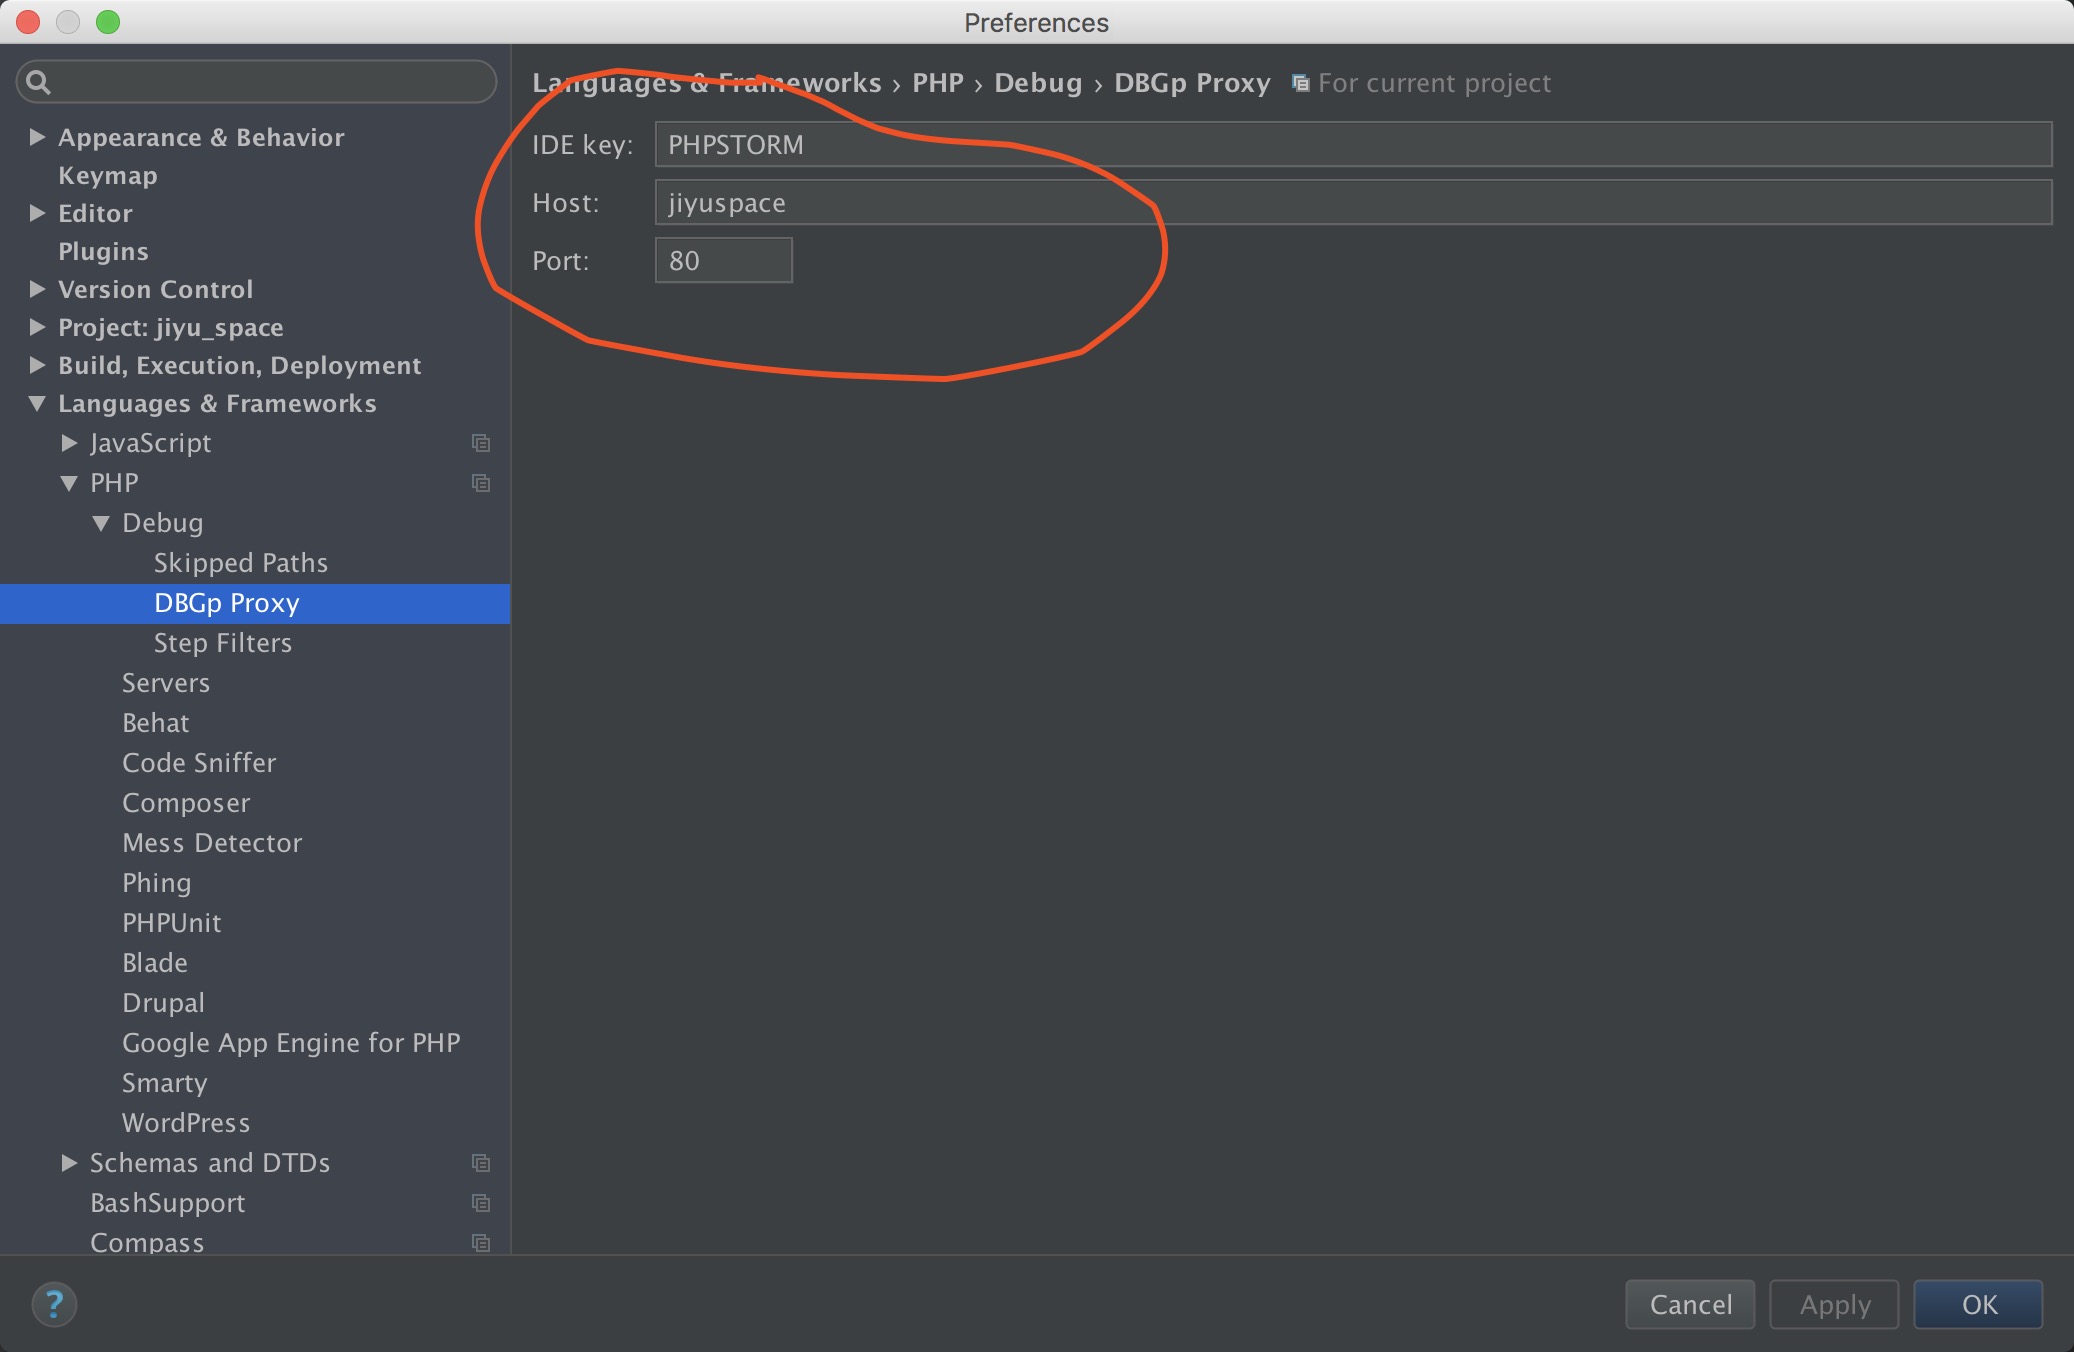
IDE key的值要和xdebug.idekey的值一致,port的值要和你即将访问的网站端口一致
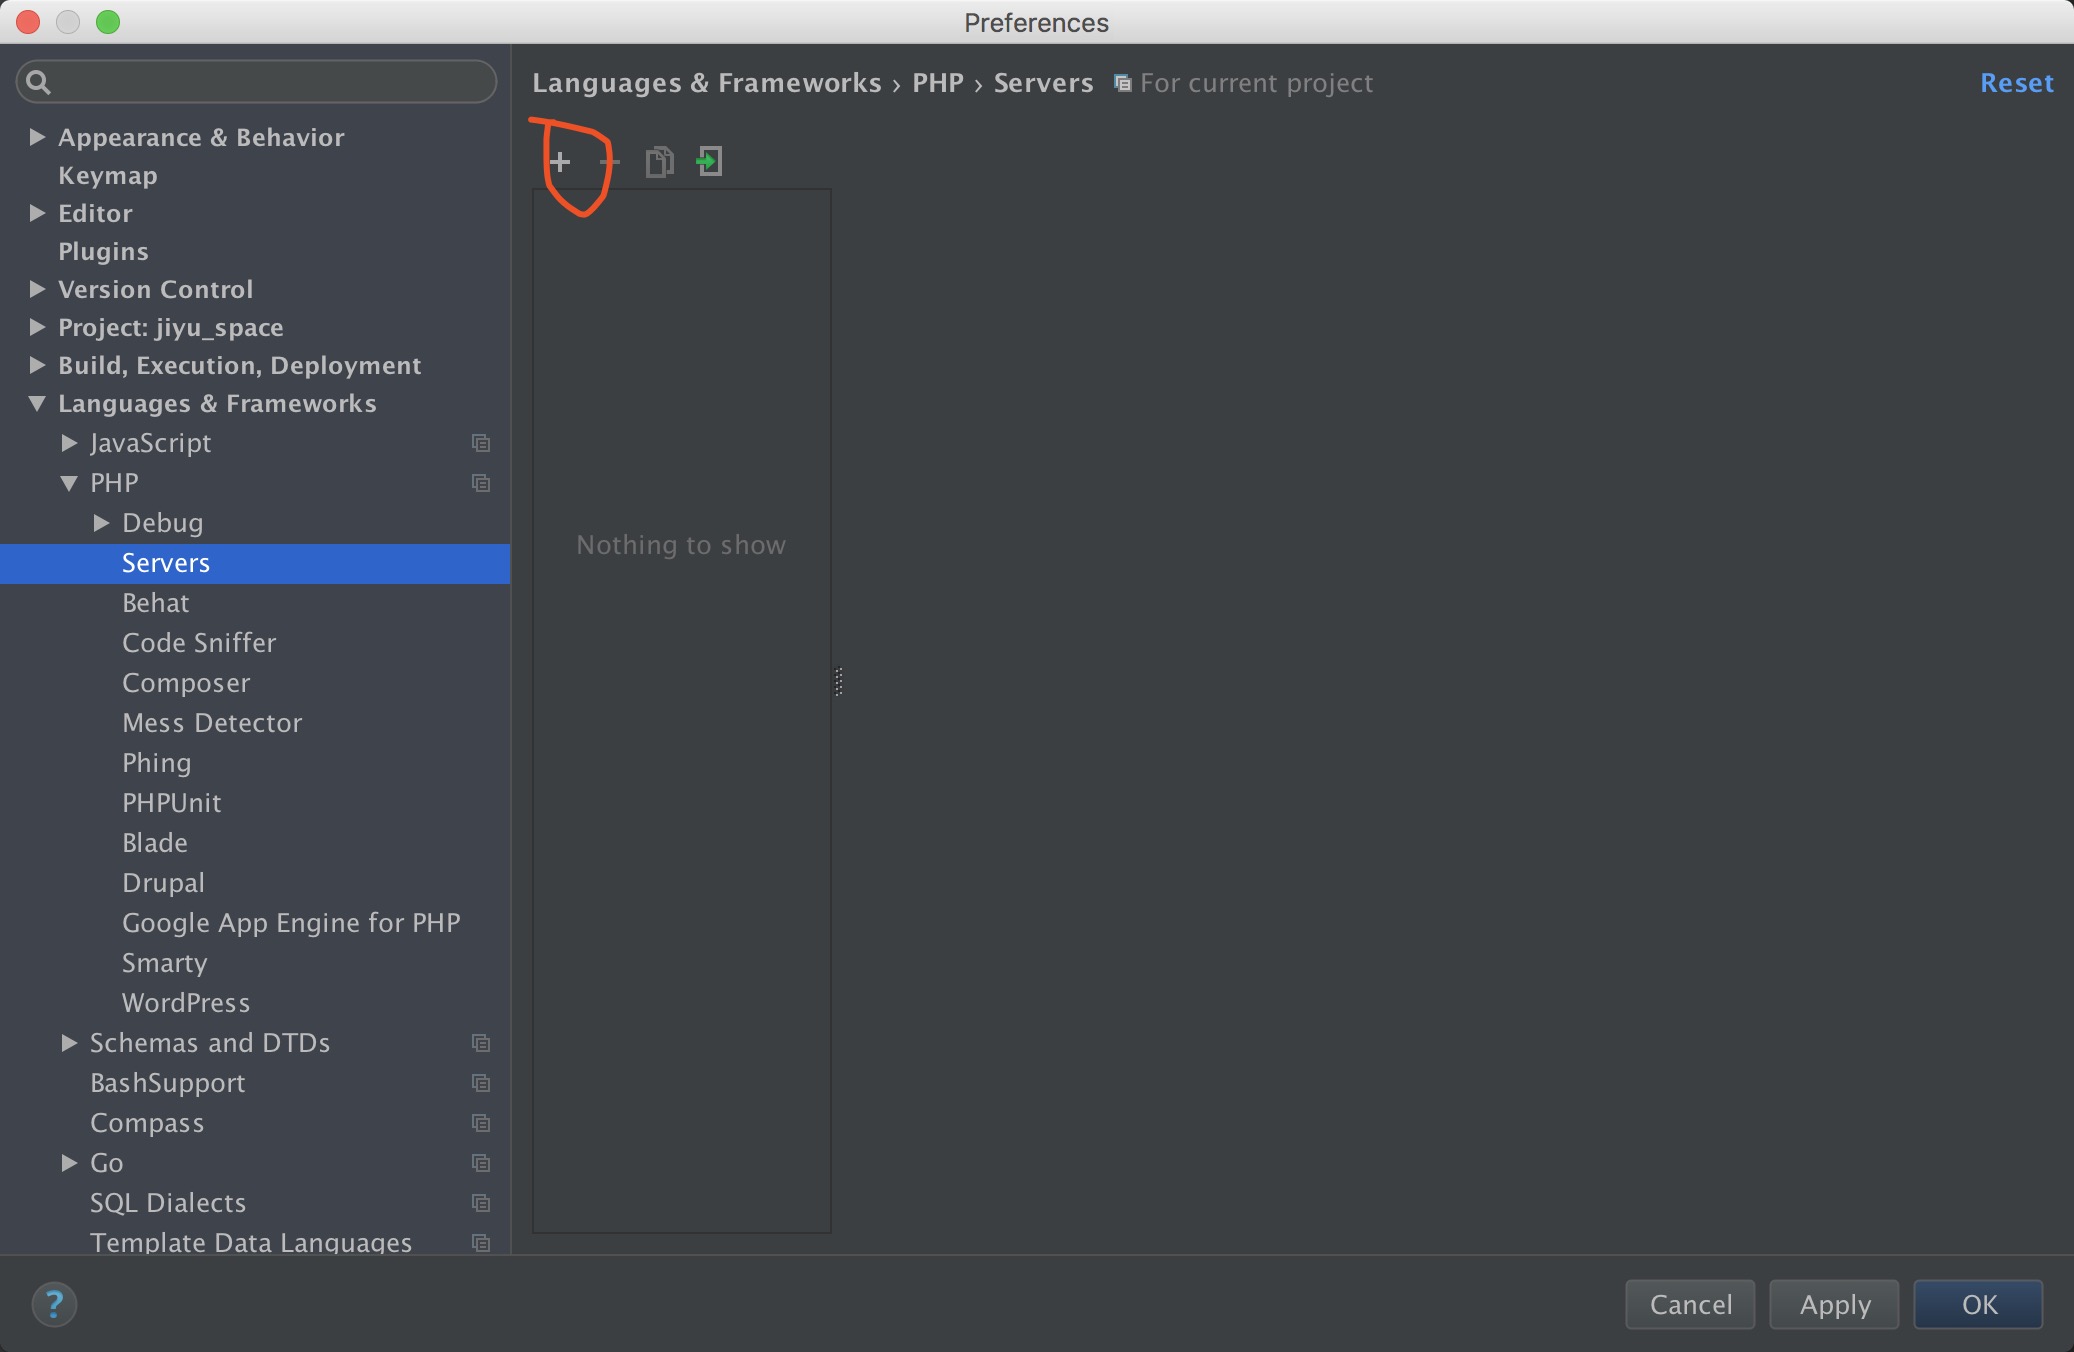
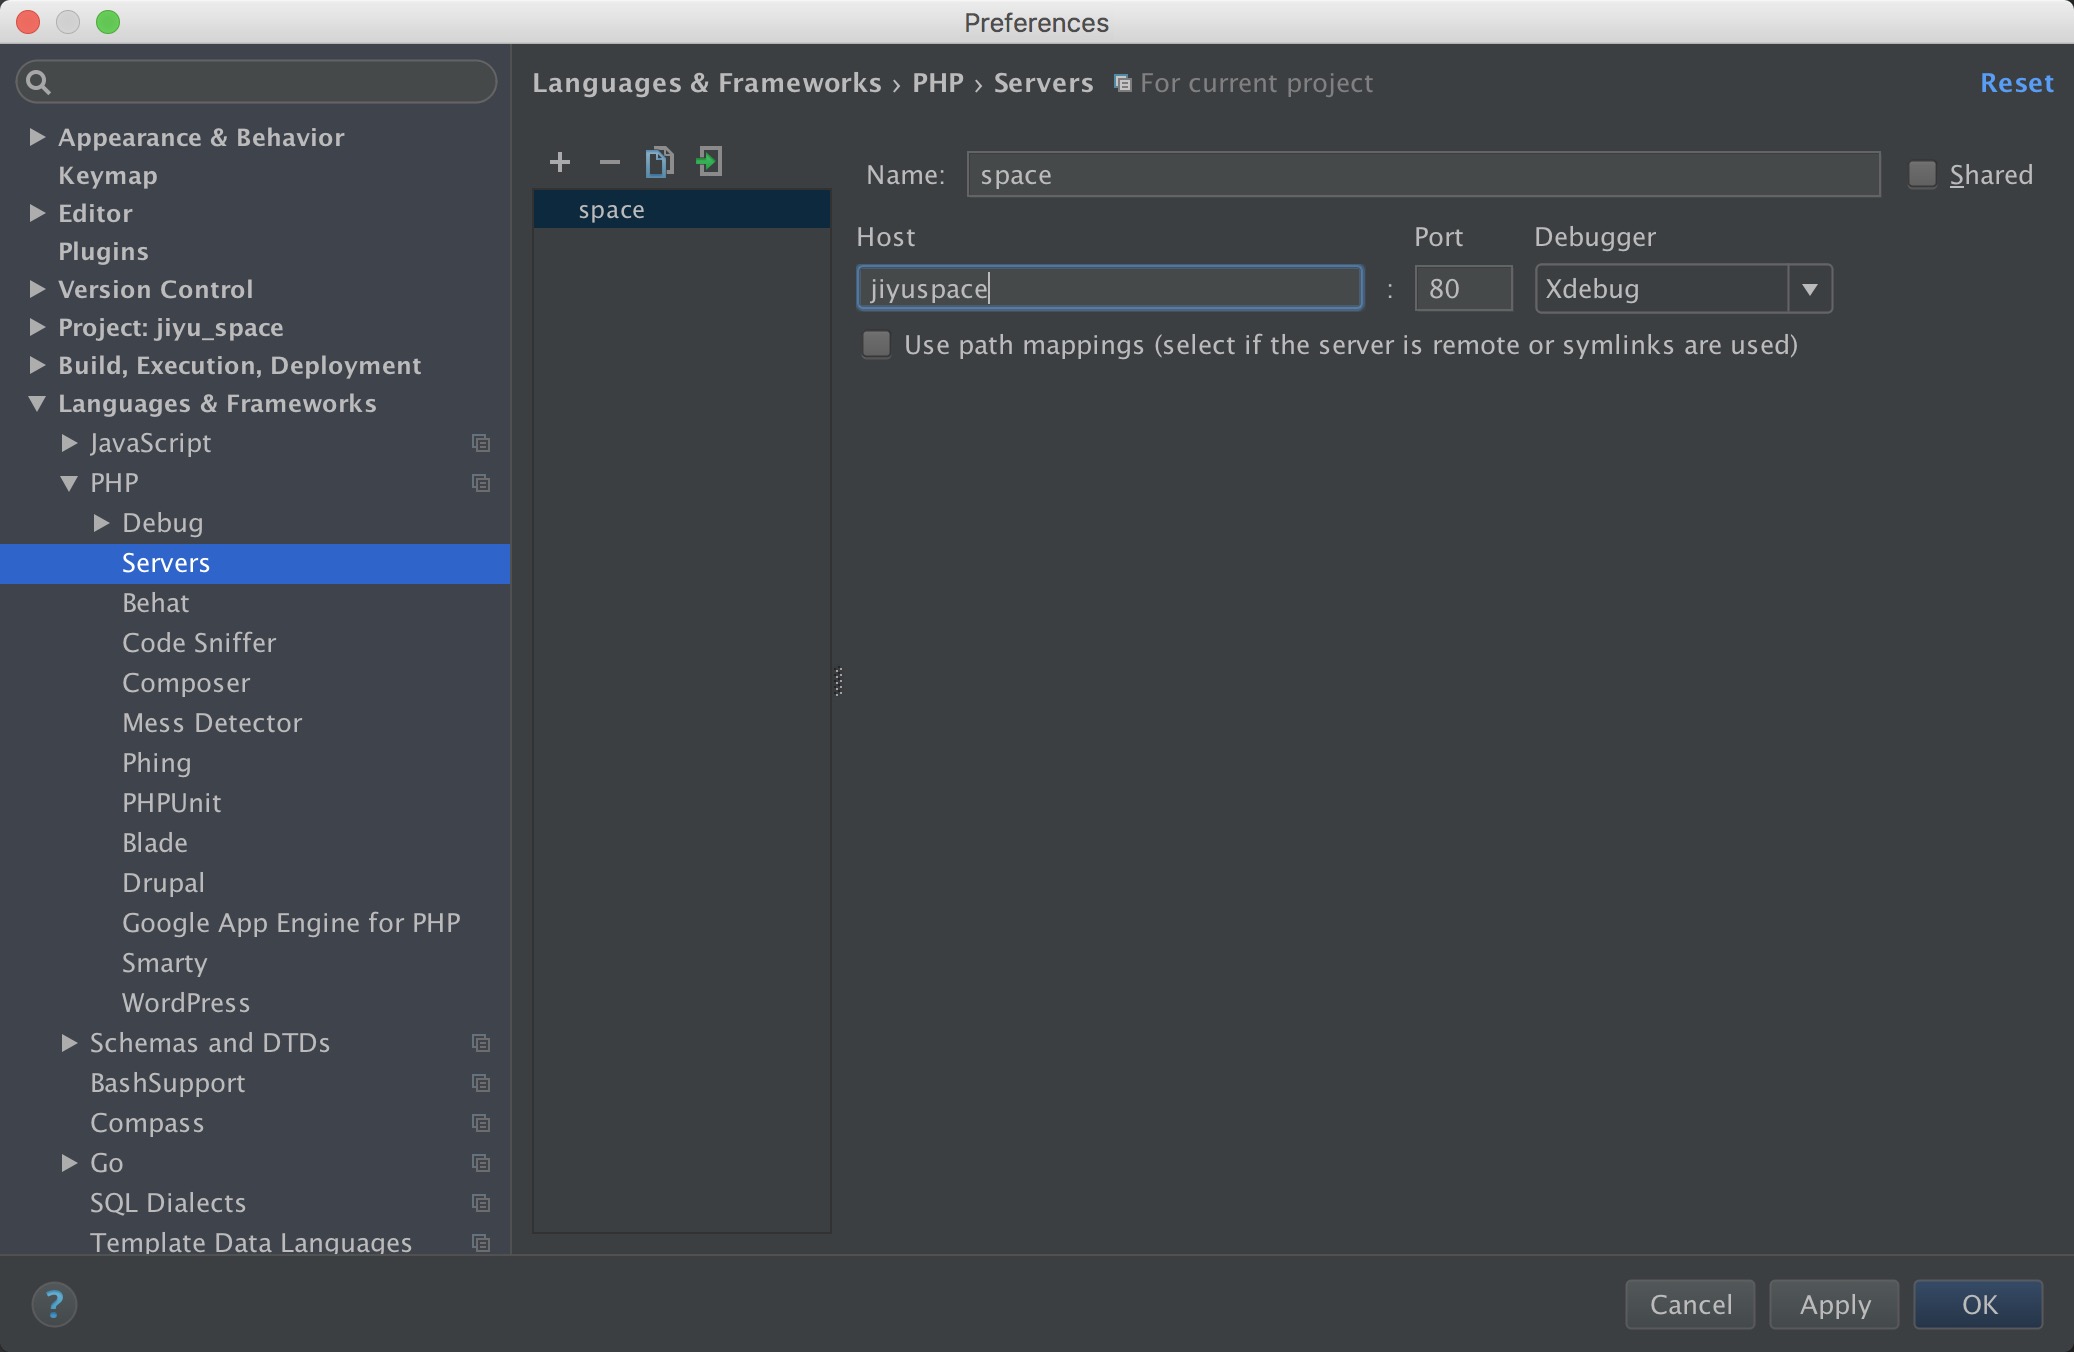
添加一个server
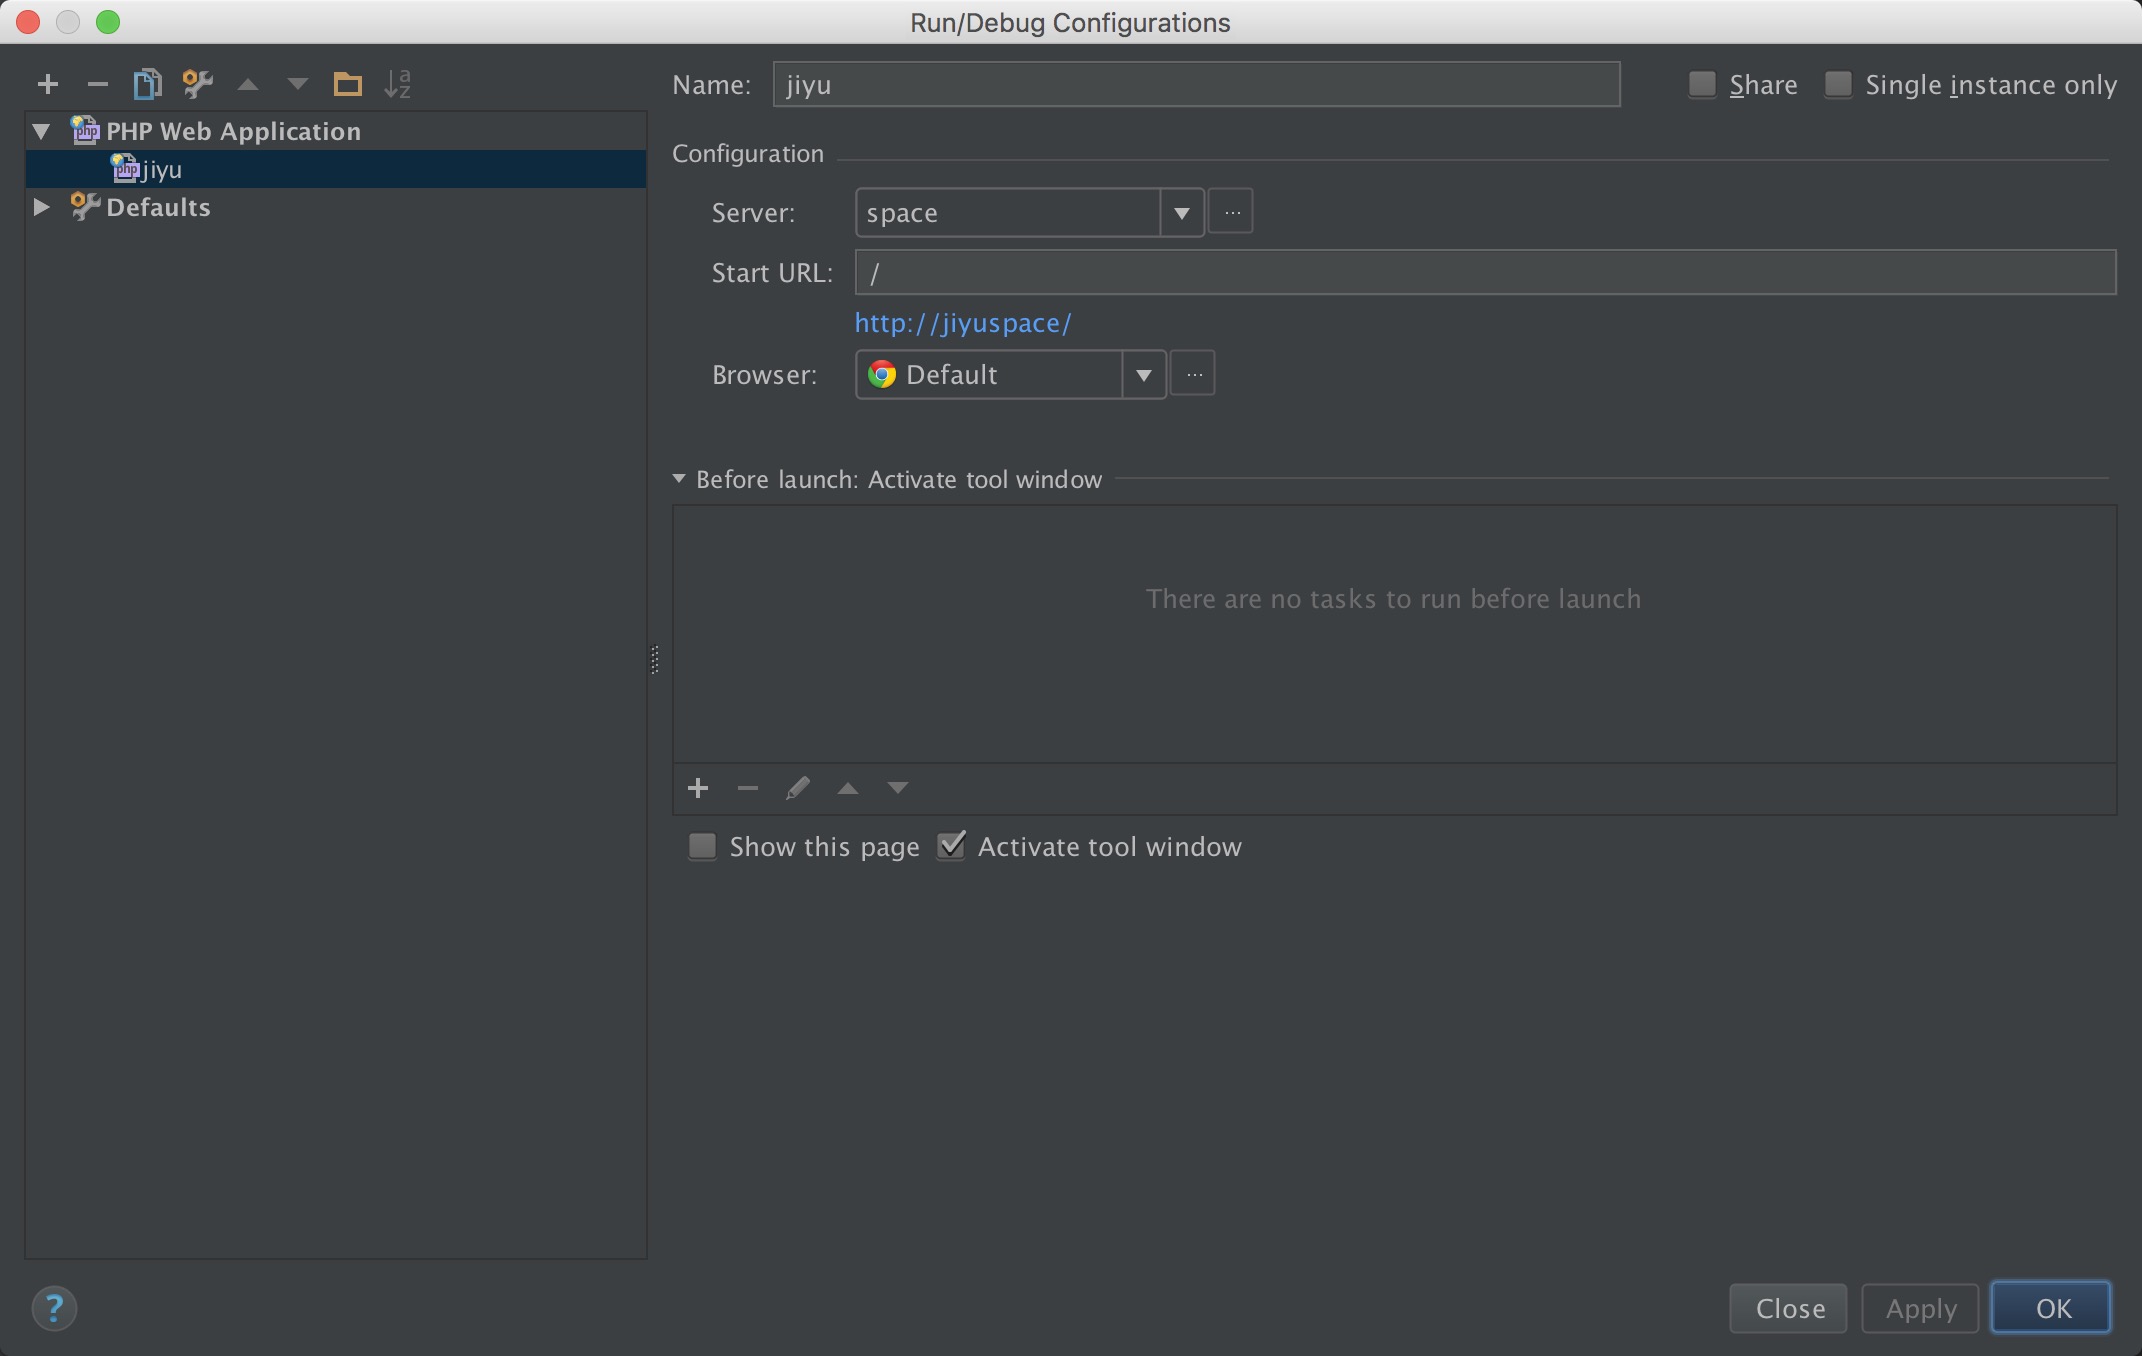
Run/Debug Configurations

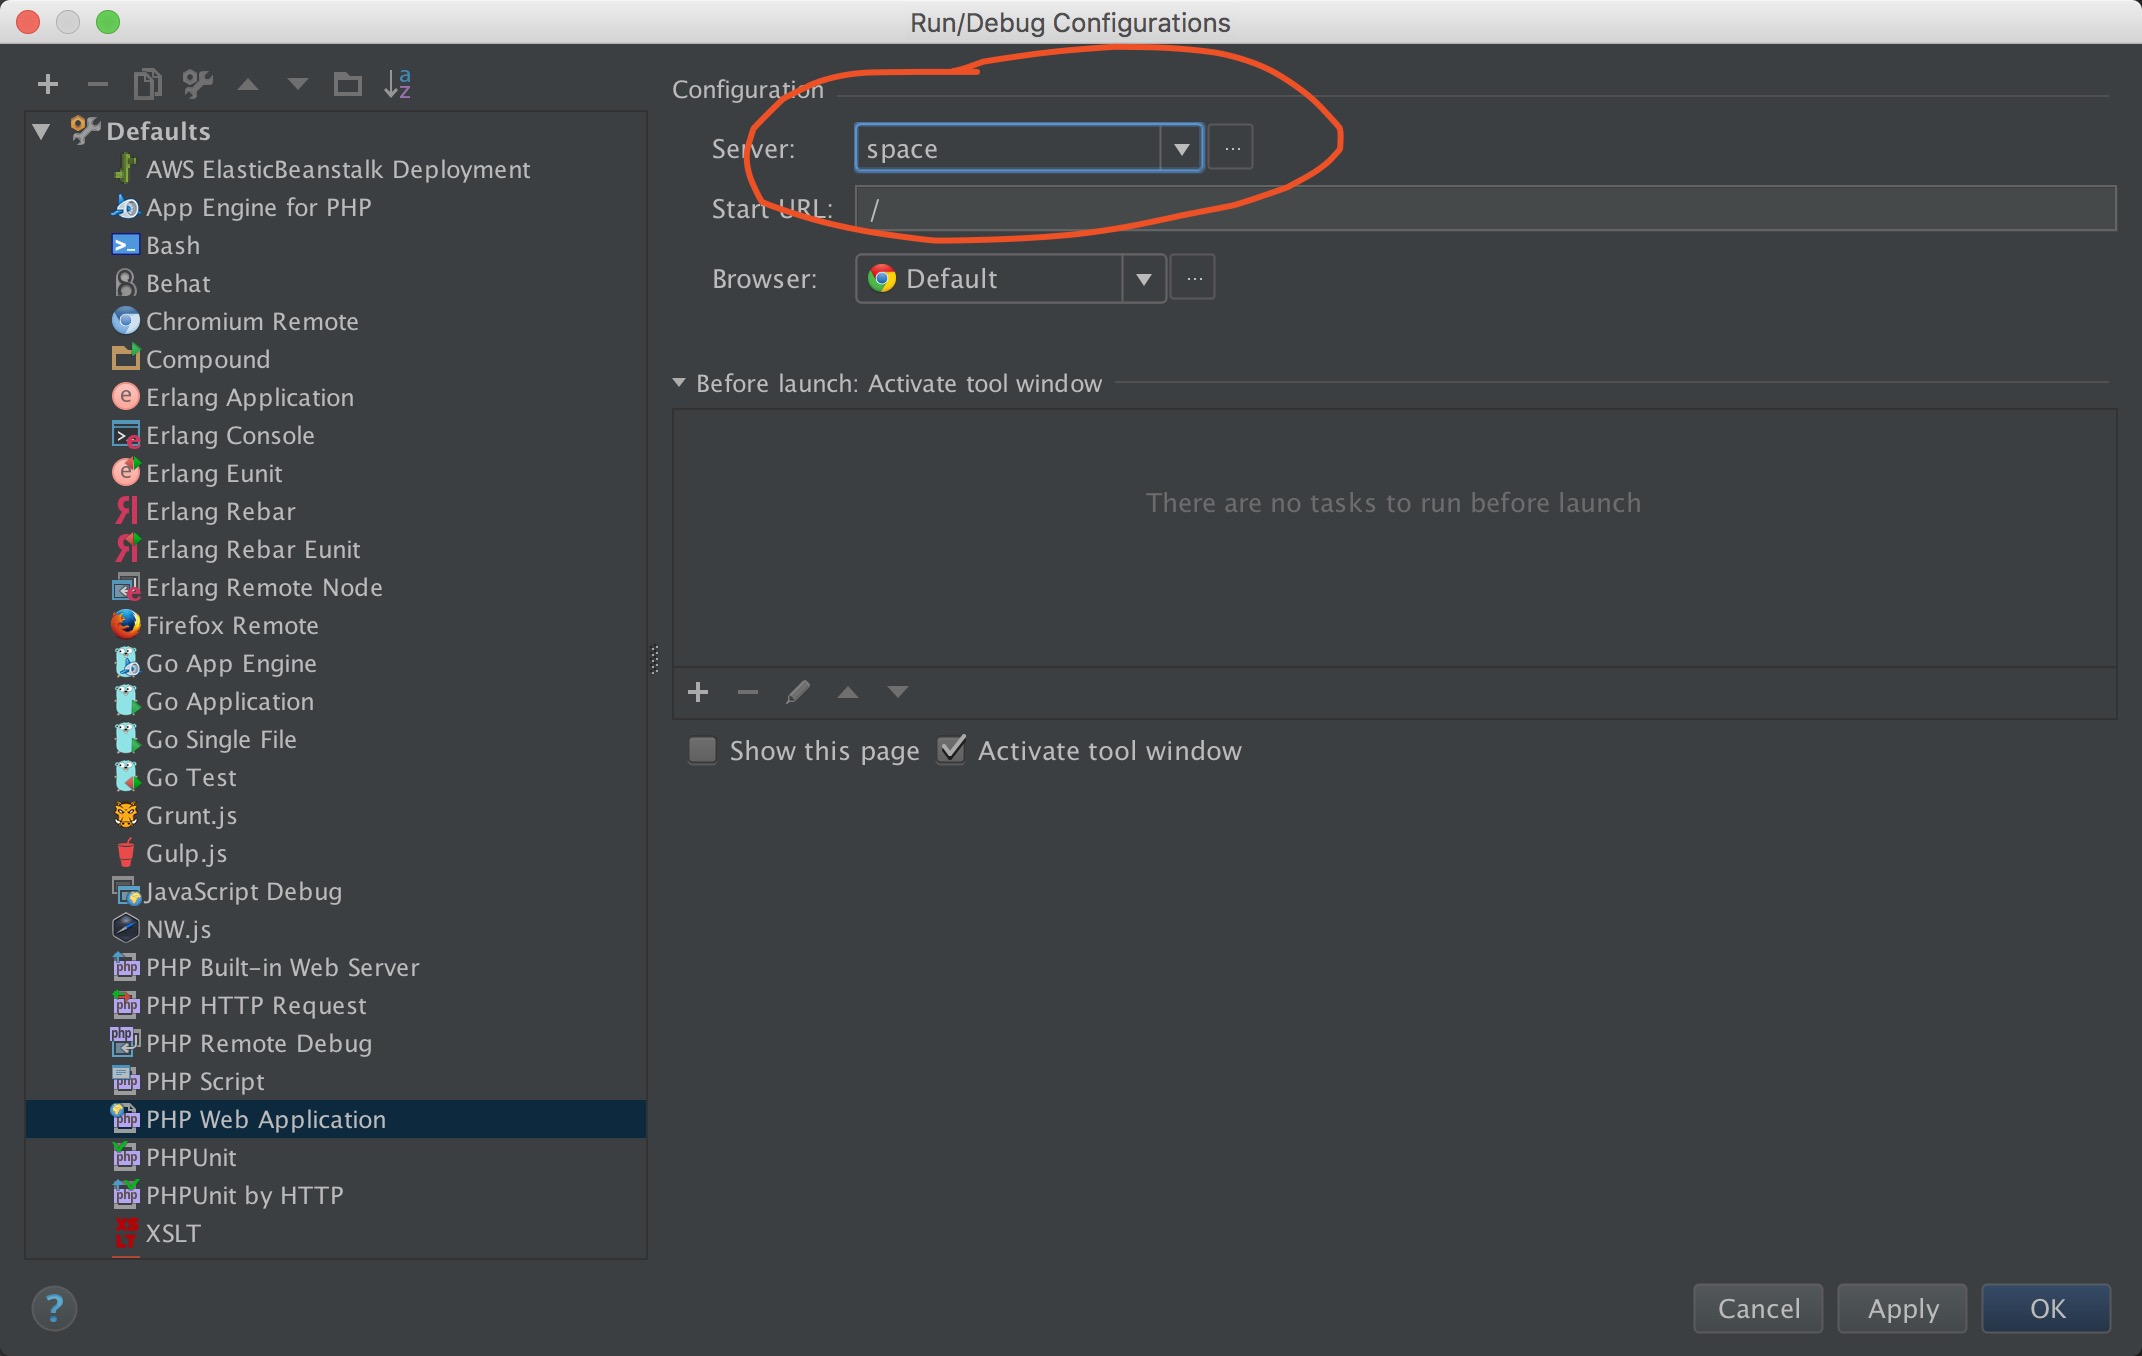
选择的server为刚才创建的那个server
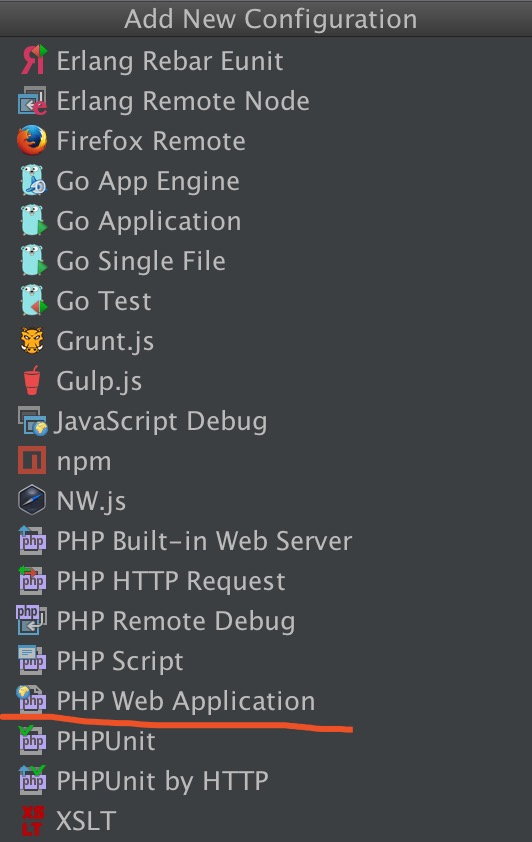 一定要选择建图中所标的``web application`` 而不是``remote xdebug``
结束
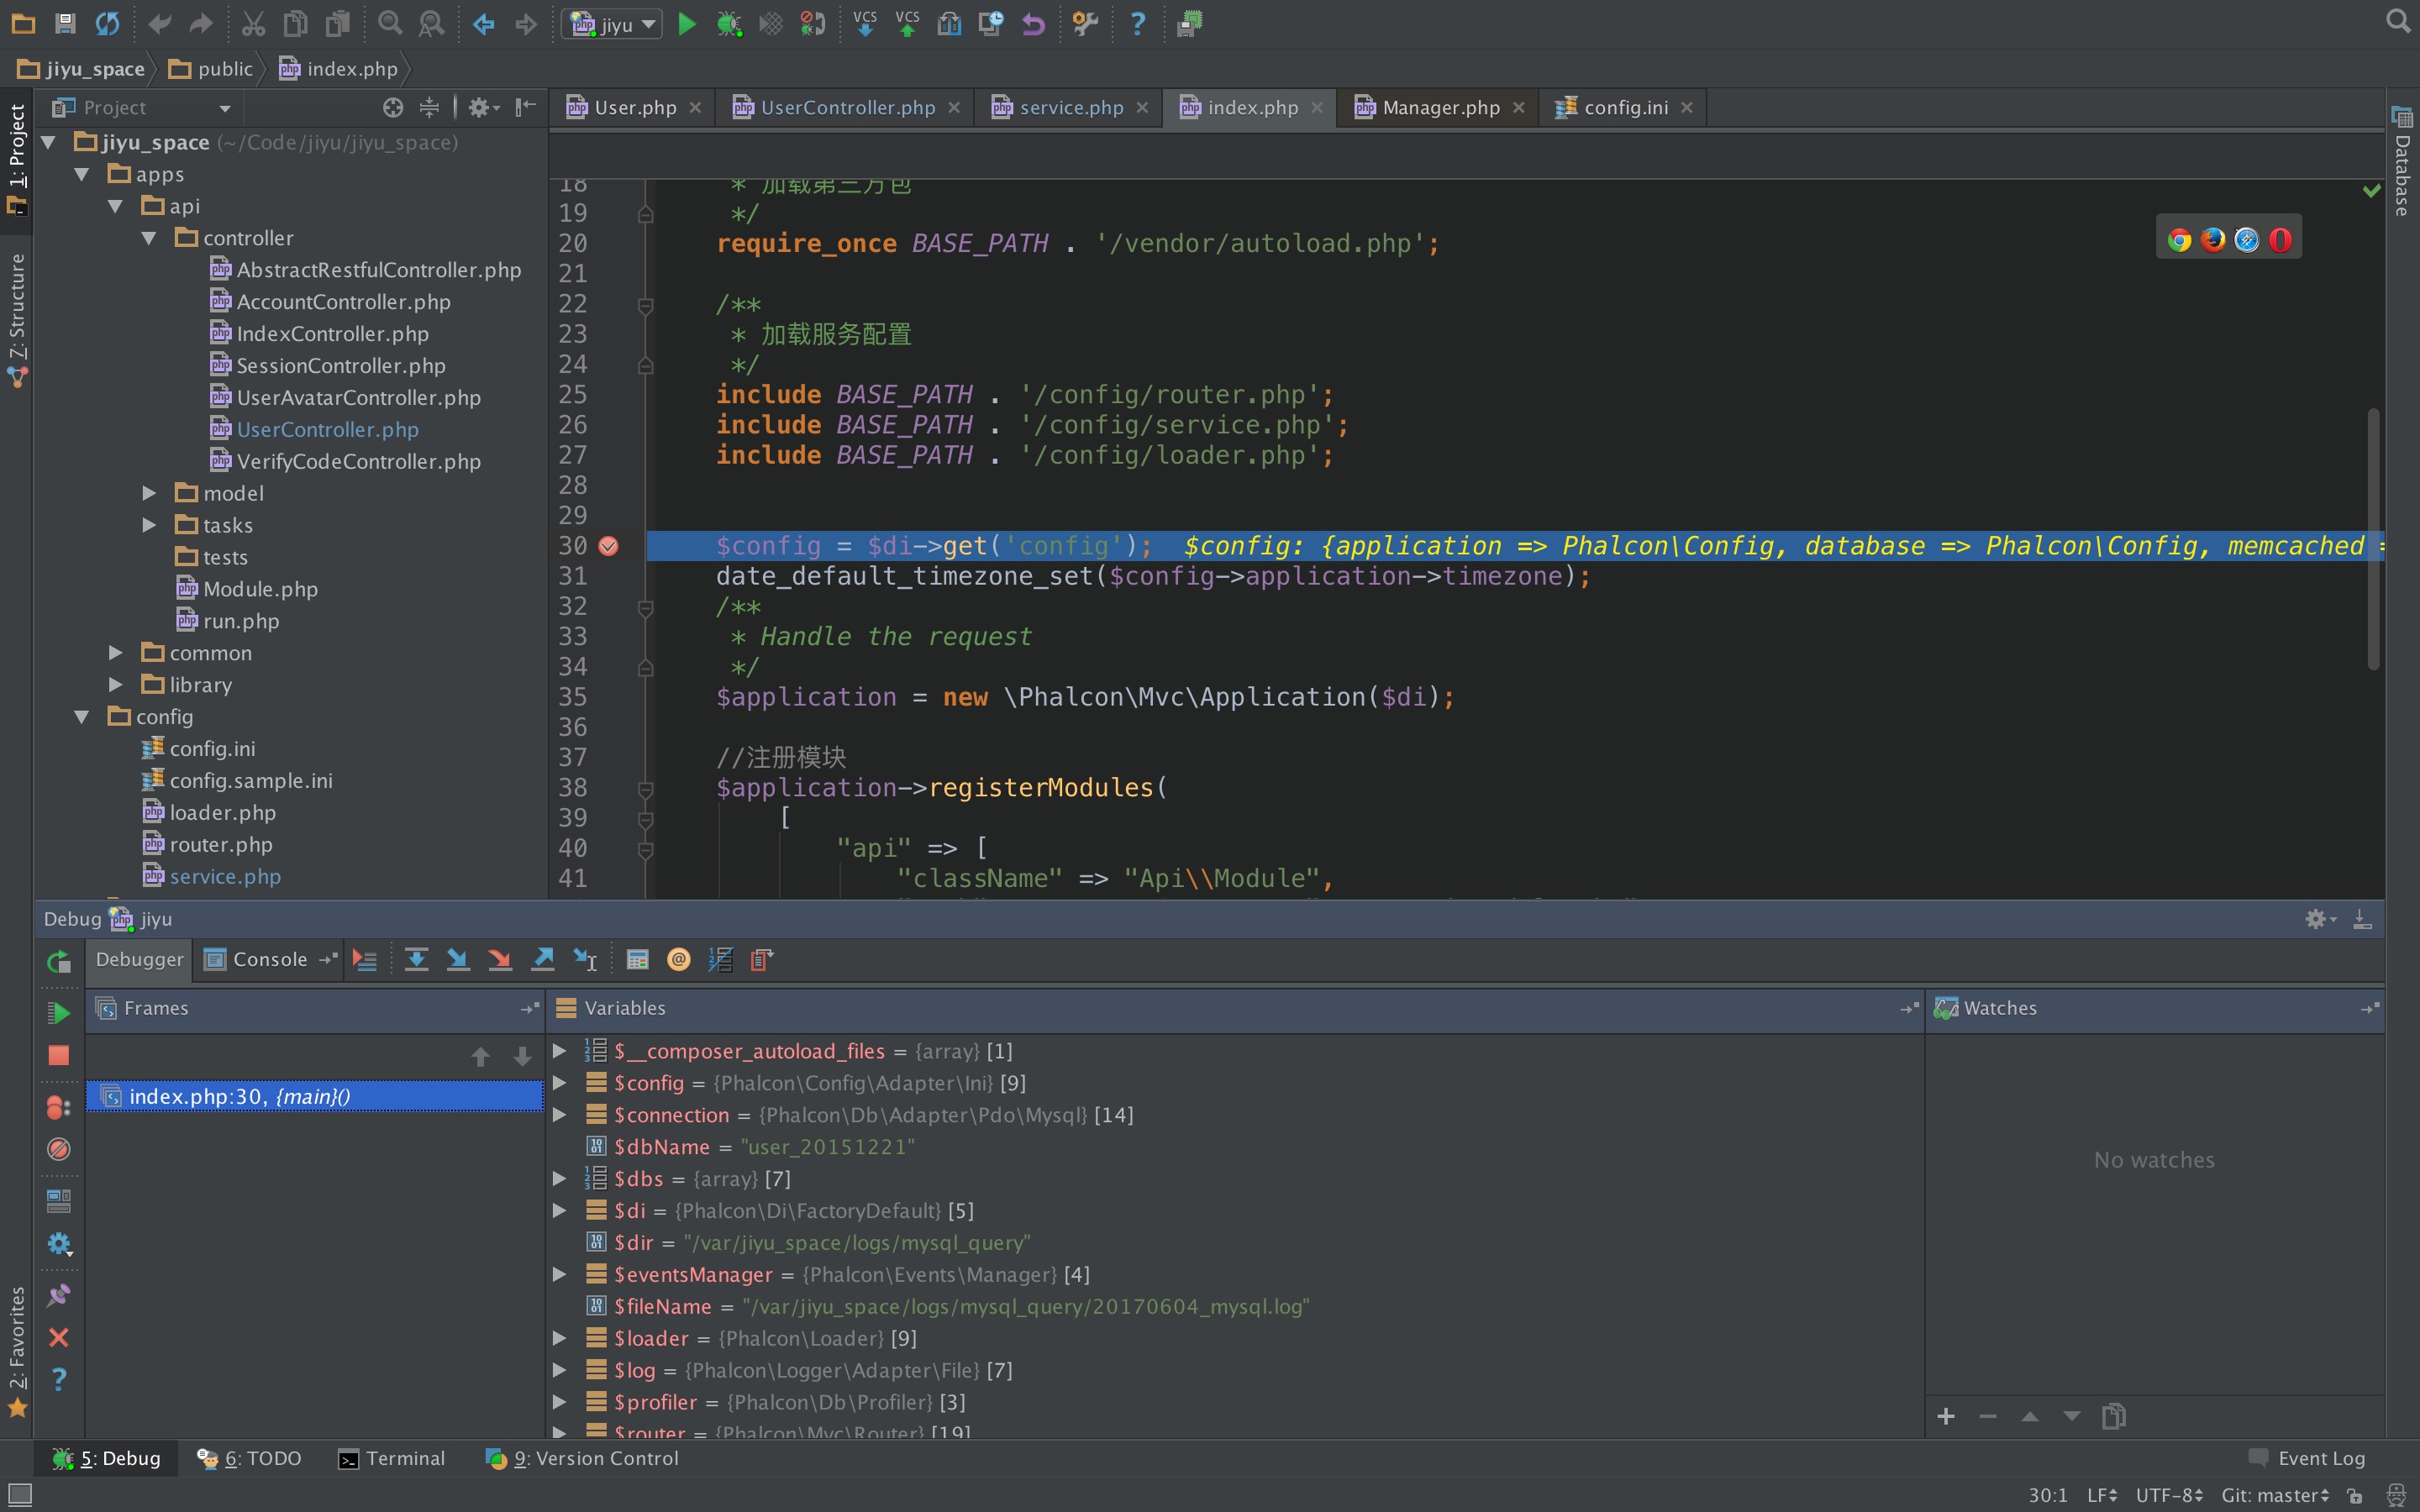
好了,现在在代码中打上断点试试: